


In this tutorial we will learn how to create a cool music design. We will use vector shapes and layer styles use vector shapes and layer styles.
Create a new file (File>New), having 1280×1024 px and 72 dpi.
Applying the Rectangle Tool (U), try to make the background of the picture to be.
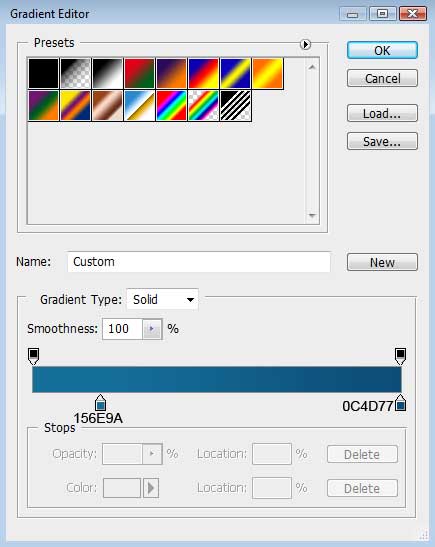
Set the next demonstrated parameters by making a mouse click on the layer we work with on the layers’ palette. Blending Options>Gradient Overlay
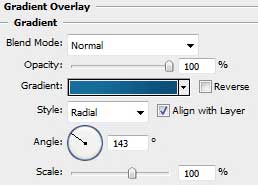
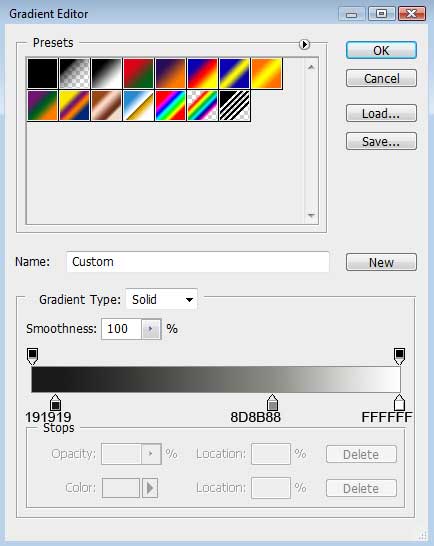
Gradient’s parameters:

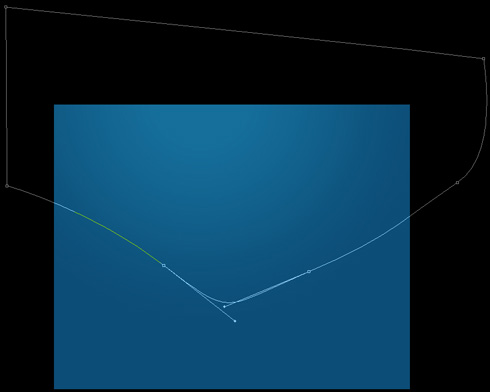
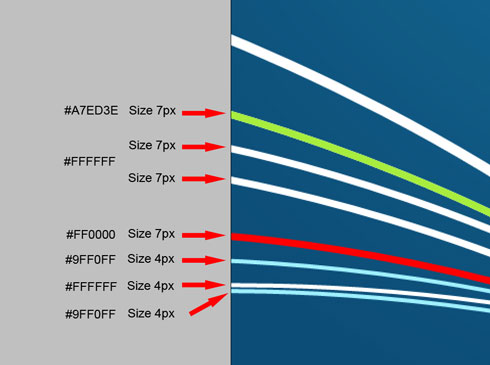
Let’s represent a ribbon. In this case we need to select the Pen Tool (P) and the Convert Point Tool for making the appropriate corrections on the element’s shape.
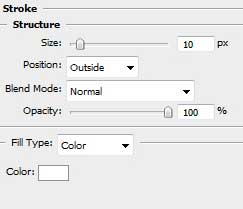
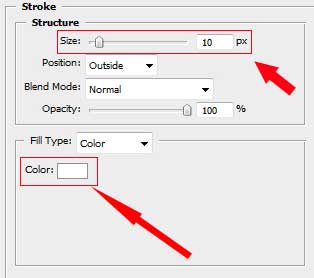
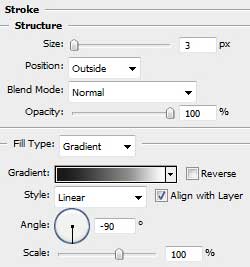
The layer’s parameters: Blending Options>Stroke

Next we shall make eight copies of the last made layer and select the Free Transform option to turn over the copies, changing also the parameter Blending Options>Stroke for the copies.

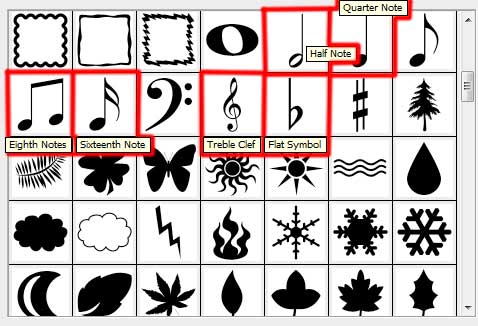
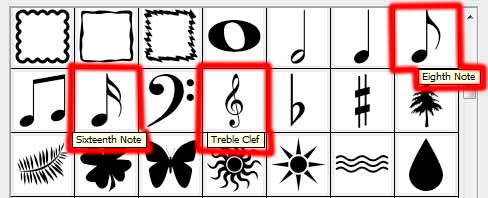
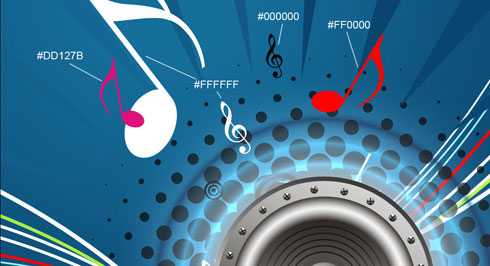
Using the Custom Shape Tool (U), let’s represent the musical symbols on the picture. Their sizes and inclining angle may be changed with Free Transform selection.
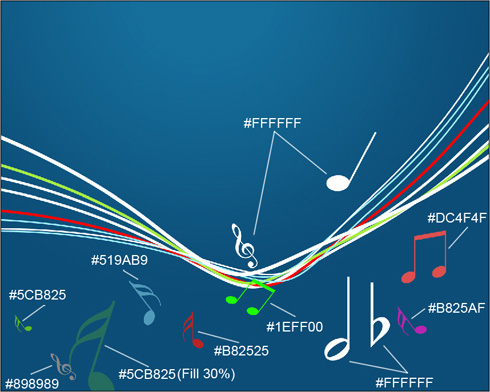
Select the same tool to insert several more circles.
Next we need to create the primary layer of the audio loud speaker, choosing for this operation the Ellipse Tool (U). 
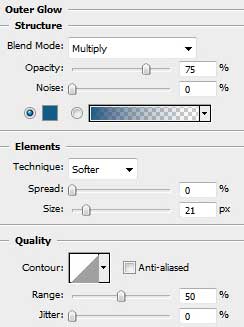
The layer’s parameters: Blending Options>Outer Glow 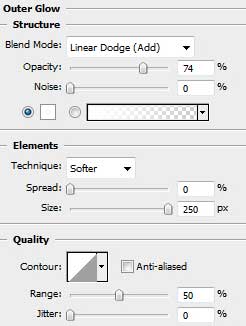
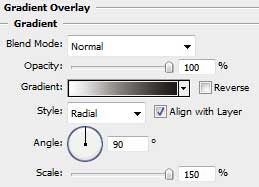
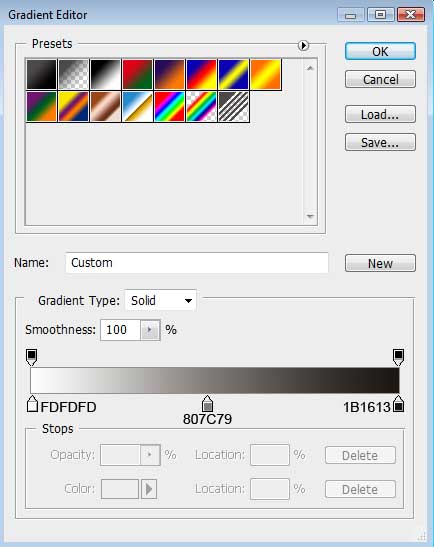
Blending Options>Gradient Overlay
Gradient’s parameters: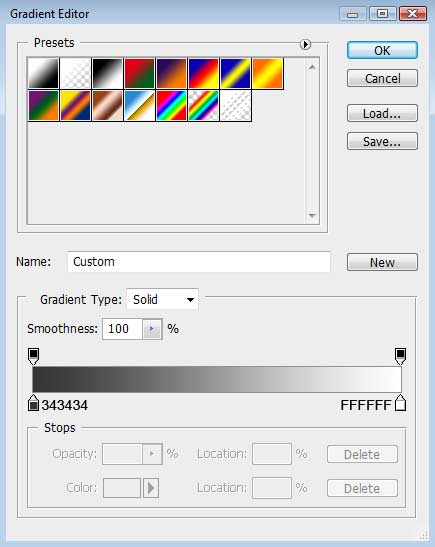

Applying the last used tool (Ellipse Tool (U)), it’s possible to represent the next layer belonging to the same loud speaker.
The layer’s parameters: Blending Options>Gradient Overlay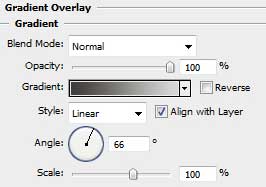
Gradient’s parameters: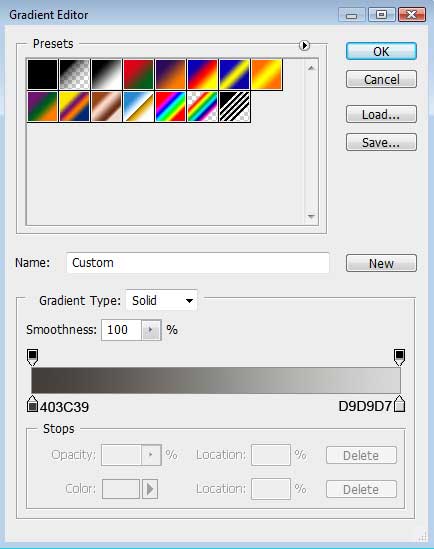

Now it’s time for the next layer, made with the same tool.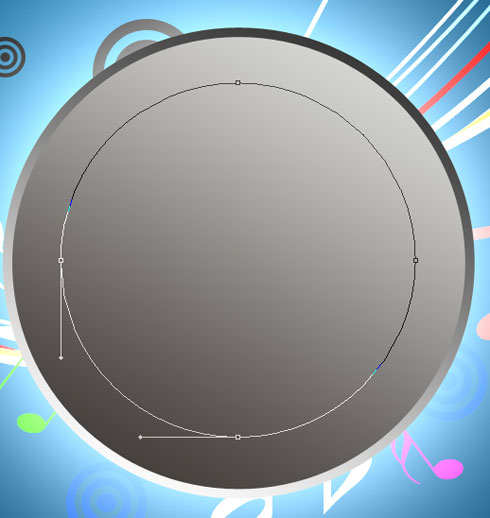
The layer’s parameters: Fill 0%
Blending Options>Gradient Overlay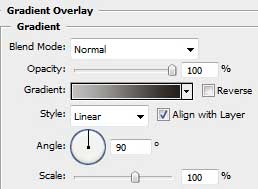
Gradient’s parameters: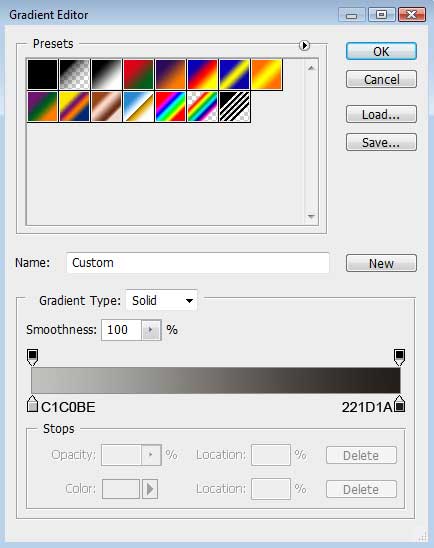

Let’s represent the primary layer of the central part of the loud speaker. The instrument applied in this case is the Ellipse Tool (U) and the color #4D4948

Make a copy of the recently made layer and select again the Free Transform solution to make the copy smaller as it is shown below, changing its parameters with those indicated below. Blending Options>Gradient Overlay
Gradient’s parameters:

Next we must insert a kind of ornament on the loud speaker, the same way indicated below. In this case we’ll use the same tool.
The layer’s parameters: Fill 0%
Blending Options>Stroke
Gradient’s parameters:

Make four copies of the last made layer and try to increase uniformly each of the next copies. The Free Transform option is helpful when placing correctly the copies, using the same positions from below.

Let’s continue representing the loud speaker. The instrument that must be applied in this case is the Ellipse Tool (U). Firstly we need to represent the outside edges of the element and then press Alt button to move off the inside element’s parts. The color used in this case is white.

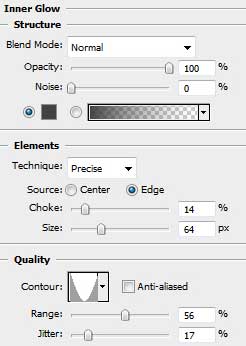
The layer’s parameters: Blending Options>Inner Glow

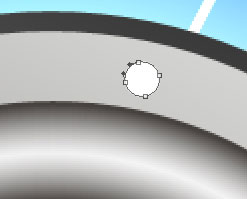
We need to represent next element containing the screw’s head on the lateral part of the loud speaker. The instrument applied in this case is the Ellipse Tool (U).
The layer’s parameters: Blending Options>Gradient Overlay
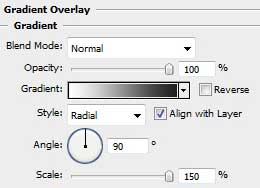
Gradient’s parameters: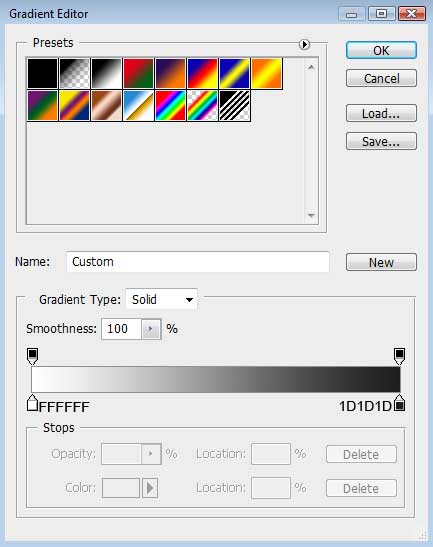

Next we shall represent an opening on the top part of the screw, selecting for this operation the Rectangle Tool (U) and the color #2B2B2B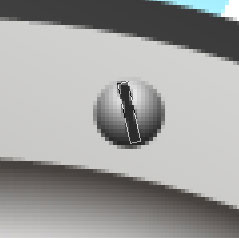
Make a copy of the layer containing the opening and select Free Transform option to turn over the copy the same way demonstrated next image.
Getting a better result is possible when combining together the layers composing the screw and those two openings (press Ctrl button to mark out the corresponding layers and hold on the left mouse’s button to move the marked layers on Create a new group solution). Make twenty – one copies of the represented group and select the Free Transform option to turn over the copies placing them as it is demonstrated below.
Next we need to represent the sound waves around the loud speaker. This time we need to choose the Ellipse Tool (U). The new waves’ layers should be situated lower than the previous speaker’s layers.
The layer’s parameters: Fill 0%
Blending Options>Outer Glow
Blending Options>Inner Glow
The next wave will be represented with the same tool.
The layer’s parameters: Fill 0%
Blending Options>Outer Glow
Blending Options>Inner Glow
Next stage we’ll represent the third sound’s wave, applying the method described above.
Blending Options>Outer Glow
Blending Options>Inner Glow


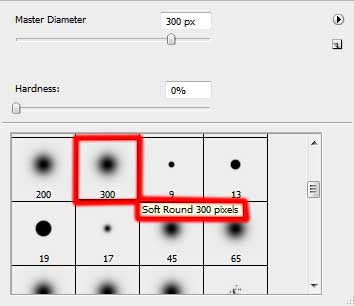
Create a new layer on which we’ll apply the Brush Tool (B) of black color (Opacity of 20%). Let’s represent a darkening with this tool. We need to position this layer lower than the loud speaker’s layers and the layers containing the sound waves (on the layers’ palette).

Create a new layer under the recently made one. Choosing the Paint Bucket Tool (G), it’s possible to add on it the white color.

Put together the layers containing the shadow’s layer and the white one. Press Ctrl button to accentuate the layers and press Ctrl +E. Set the next filter’s option for the combined layer: Filter>Pixilate>Color Halftone

Set the next parameters for the last made layer. Fill 70%
Blending Mode-Darken

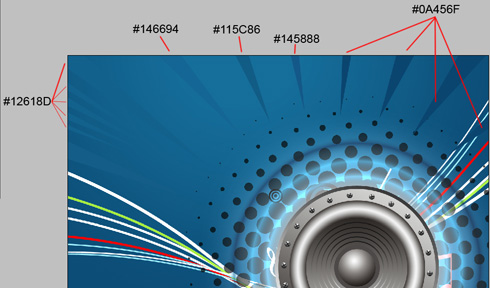
Next we need to insert several rays on the top part of the picture. The selected instrument for this operation is the Pen Tool (P). The ray’s color is #145D88
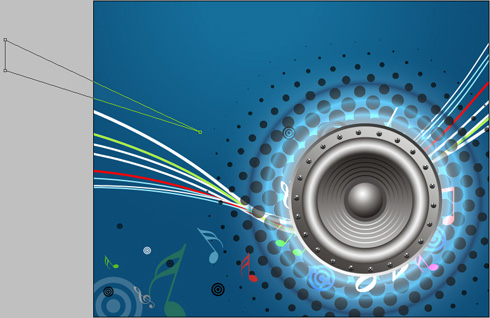
Applying the same tool, the Pen Tool (P), it’s possible to picture the rest of the rays we need to introduce on the picture.
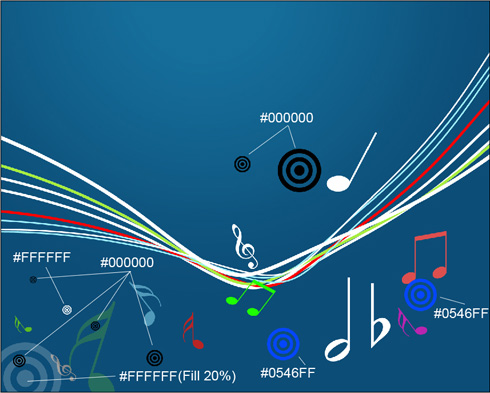
On the last stage we’ll add several more musical symbols, choosing for the manipulation in case the Custom Shape Tool (U).
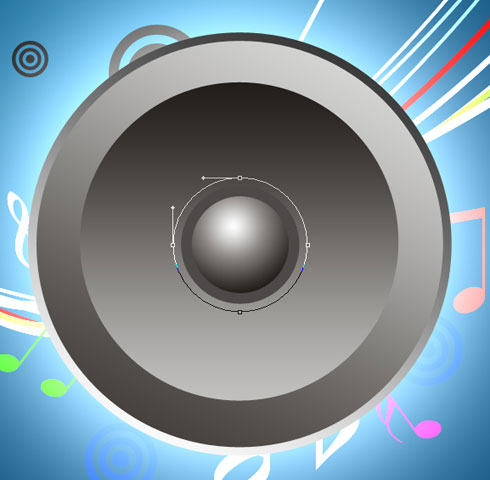
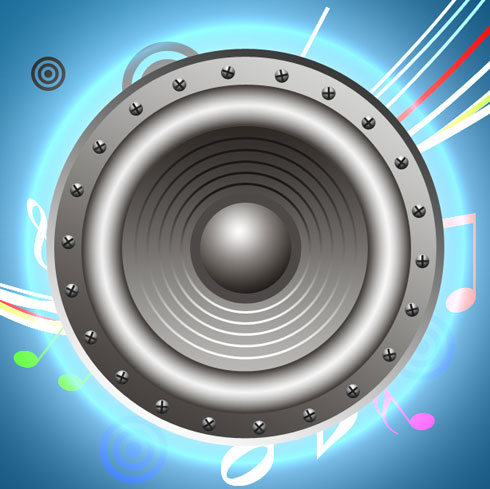
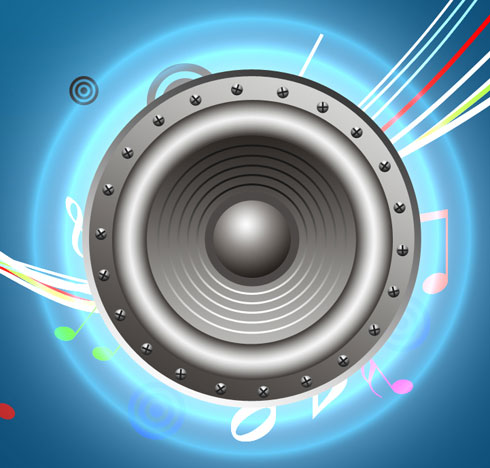
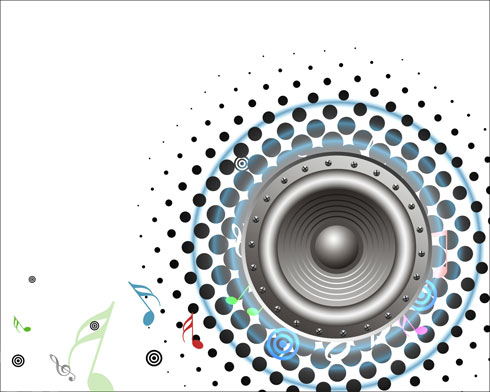
The final result!