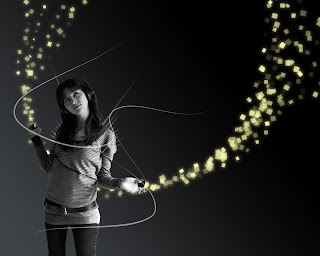
In this tutorial, we will learn how to create a variety of light effects using glows and lots of neon, that can be applied to photography or illustration with equal impact.
Let’s create a new file (File>New) of 1280×1024 px and 72 dpi. Then apply the Rectangle Tool (U) to represent the background of the picture to be.
Use the next shown parameters for the made layer by making a mouse click on this layer on the layers’ palette. Blending Options>Gradient Overlay
Gradient’s parameters:
Find a picture, having represented a girl on it (I used this picture from SXC. I would like to thank the author of this picture):
Cut her figure out and insert it on the main picture:
Click on the bottom part of the layers’ palette on Create new fill or adjustment layer>Curves
Press Alt button and make a mouse click between the Curves effect’s layers and the girl’s layer (on the layers’ palette)
Next click on the bottom part of the layers’ palette on Create new fill or adjustment layer>Black & White
Press Alt button and make a mouse click between the Black & White effect’s layer and the previous layer (on the layers’ palette)
Next create a new file (File>New) of 50×50 px and 300 dpi. Delete background and use the Pencil Tool (B) to represent a black square instead of it of 31×34 px.
Select then the option Edit>Define Brush Preset
Now we shall create a new layer and apply here the created brushe, set brushe options in Brushes palette (F5), that may be chosen on the lateral panel on the right side. The brush’s color is #E6E6AC. Let’s represent a shape looking like a train on her both hands. This layer needs to be placed lower than the layer containing the girl.
Next you may see the parameters for the layer containing the brushes: Blending Options>Outer Glow
Let’s represent a kind of wing of white color for the girl, applying in this case the Pen Tool (P). Place this layer lower than the girl’s layer:
Make a copy of the last made layer and select Free Transform option to turn the copy around, placing it the same way from below. This layer will be situated also lower than the girl’s layer:
Next we’ll rasterize the wings’ layers into a single one. Press Ctrl button to mark out the necessary layers and then press CTRL+E. On the new layer we’ve got make a mouse click on the bottom part of the layers’ palette on Add a Mask selection. After this operation, try to use a standard brush (Brush Tool (B)) (Opacity of 30%) to clean out with black color the layer containing the wings.
Next we’ll represent a line, starting with drawing path, applying the Pen Tool (P), Path Mode.
You can find created path in Path palette.
Move in Layers palette to Create a new layer and choose for it a standard brush of grey color (Diameter 9, Hardness 100%), select Pen Tool (P), and make a right click on created path in Path palette to Stroke Path (Brush Mode, Simulate Pressure)
Using the same method, try making one more:
Finished!

